Simple Recipes

Chipotle Lime Shrimp Tacos

This taco dish comes together in a snap and is probably one of the most delicious tacos I have ever had! It will easily become a household fav, so don’t be shy to double up on this recipe as you’ll definitely want the leftovers.

Marinated to sweet and spicy perfection, these grilled shrimpy’s pair perfectly with just about any topping. I like to mix mine up with homemade pico de gallo, guacomole, mango, cabbage and extra cilantro.

Ingredients: (makes about 8 tacos)

  • 6 tbsp lime juice
  • 2 tbsp chipotle in adobo sauce
  • Salt & pepper
    1/4 c olive oil
  • 2 cloves garlic.
  • 1lb shrimp
    1/4 c honey
  • Zest of 1  lime
  • corn or wheat tortillas

fullsizerender-13

  1. Marinade shrimp for 2 hours or more.
  2. Mix together, 1/2 cup fat free sour cream  , 1tbsp chipotle in Adobe sauce, 1 tbsp lime juice, zest of 1 lime , 1 clove garlic, make this while shrimp marinade’s so flavours mellow.fullsizerender-12
  3. Cut up avacodo, shredded cabbage , cilantro, mango’s , tomatoes etc. for garnishing taco’s.
  4. Cook shrimp till pink and then put together as taco’simg_1519

img_1520

Betcha can’t eat just one! xx

Raw Key Lime Pie

“You attract what you are.” – Dr. Wayne Dyer

And I’m happy to say many of my friends are like minded when it comes to food, lifestyle, interests and health. We spend A LOT of our time exchanging views, best practices, hidden gems and favourite recipes. With that being said, I would be remiss if I didn’t share their best ideas. 🙂

Which leads me to introduce, my friend Kieran Darcy, who I’m thrilled to say will guest blog with some of her favourite dish’s, along with some of her beautiful photography. You’ll quickly notice, her skills are much better than mine (she is a very talented photographer) and gets it right every time. Please check  out more of her amazing work here.

Kieran had my mouth watering when she first told me about her Raw Key Lime Pie recipe. And with each week she had a new variation to share and that’s when I knew I had to have her dish about it!

Without further ado, here’s Kieran’s Dish –

A few months ago I decided to make a key lime pie for my dad’s birthday. I don’t know why, but I’m glad I did. I started googling ‘raw key lime pie’ to find something that would suit his celiac & diabetic needs and came upon this. The amazing thing about this recipe is that it’s really just a launching pad for any dessert you want to make. For any of you who don’t like following instructions or baking, this is the dessert for you.Raw Key Lime Pie

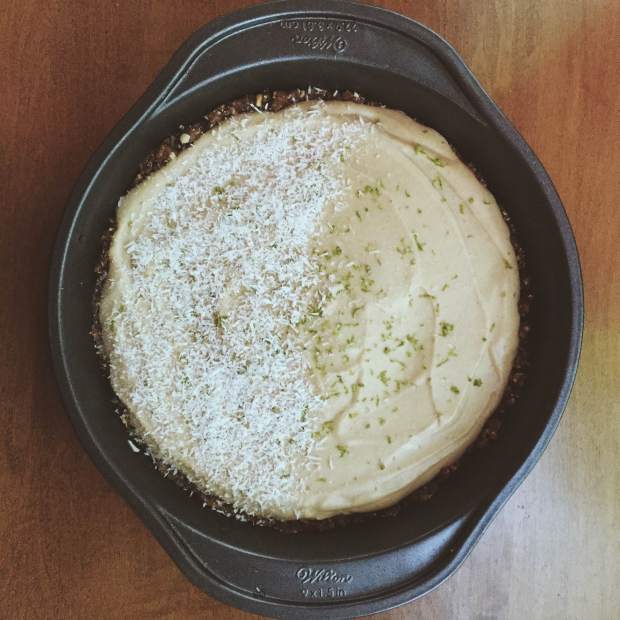
Let’s take a moment and appreciate the fact that the main ingredient in this dessert is cashews. Maybe I’m just ignorant, but I had no idea what they were capable of. Sorry cashews, I underestimated you. Since mastering the key lime pie I have adapted the recipe to make pumpkin, chocolate-orange, chocolate-raspberry, and lemon pies. With the lemon pie I added some Astarte blueberry-lavender preserve to each slice when serving – Sooo good!Raw Pumpkin Pie

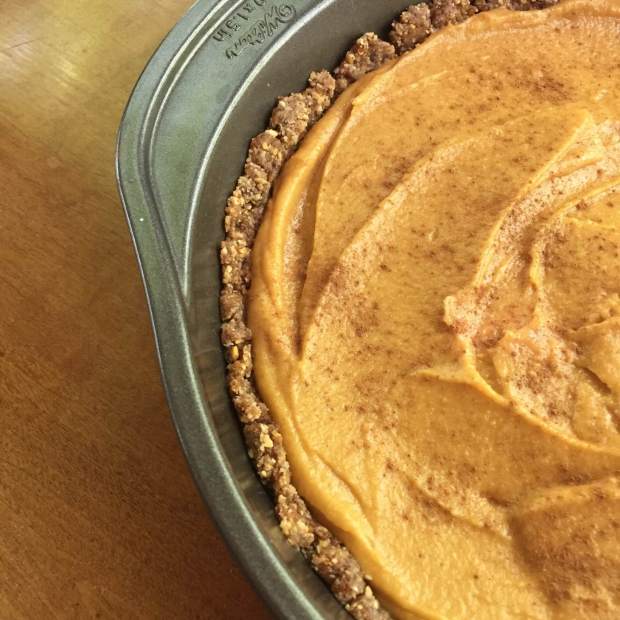
This dessert has become a staple for every family gathering and I get to pretend I’m a really great baker when all I’ve done is blended. Easy, healthy, and delicious. I will say that attaining all of the ingredients is a bit pricey but you won’t need to buy them every time.  So take this recipe and make whatever you want with it. Cover it in nuts, fruit, add peanut butter, make different flavour layers, increase the crust measurements…Do whatever you want.
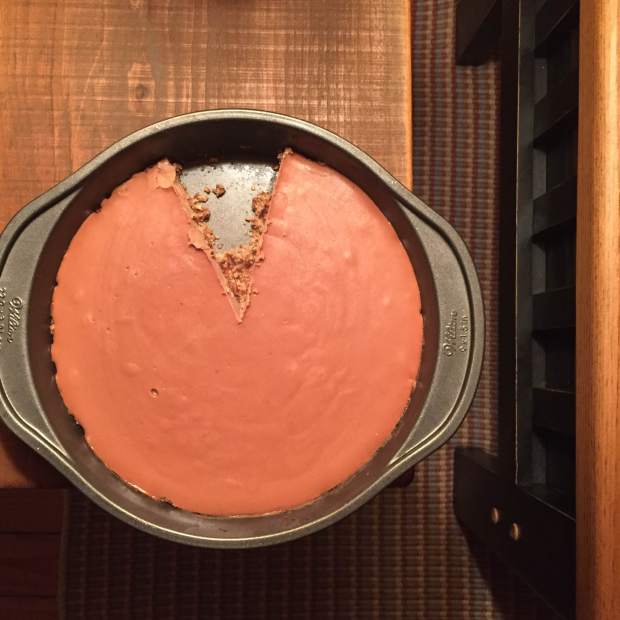
Raw Chocolate Orange Pie

Raw Key Lime Pie

Crust:
  • 1 cup dried dates
  • ½ cup whole almonds, coarsely chopped
  • ½ cup whole pecans, coarsely chopped
  • ¼ cup unsweetened shredded dried coconut
  • 1 Tbsp coconut oil
  • Pinch of sea salt
Filling (Key Lime):
  • 2 cups cashews
  • ¾ cup fresh lime juice
  • ½ cup maple syrup
  • ⅓ cup melted coconut oil
  • 1 tsp matcha powder (optional for color only)
  • 1 tsp pure vanilla extract
  1. Put all the crust ingredients into a food processor, and process until the ingredients can just stick together. Pie Crust
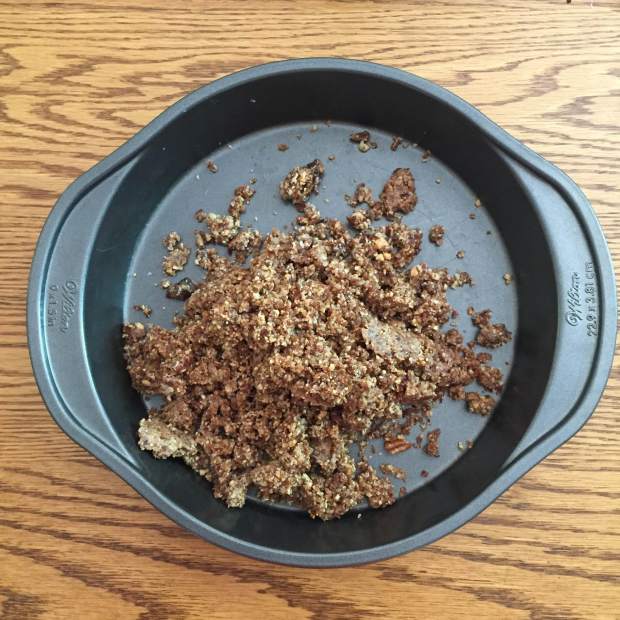
  2. Press the crust mixture into the bottom and up the sides of a 9­inch pie dish
    Pie Crust
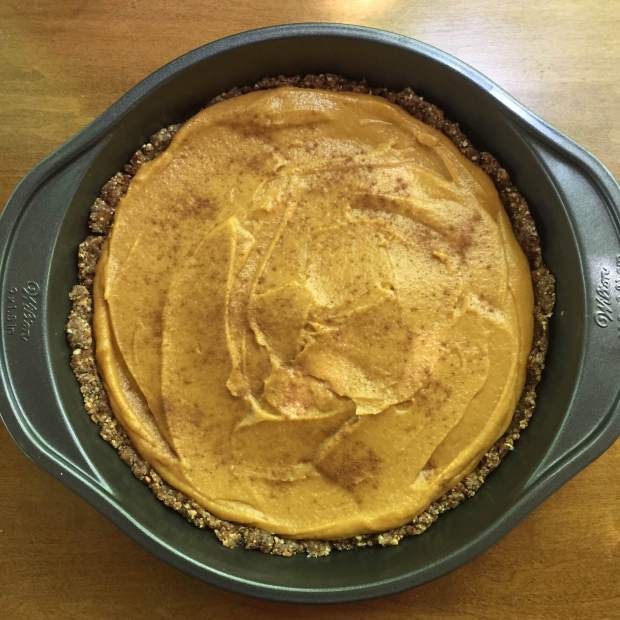
  3. Place all the filling ingredients in your high-speed blender or food processor and blend until the filling is completely smooth and creamy.
  4. Pour the filling evenly over the pie crust, smooth with a spatula.
  5. Place the pie in the freezer covered to set for at least 3 hours, or overnight if possible.
  6. Let the pie sit at room temperature for 10 minutes and garnish before serving. I used coconut and lime zest on the Key Lime variation.Raw Pumpkin Pie

Enjoy!

Parsnip Noodles with Roasted Butternut Squash & Kale

Happy Monday Friends! Hope you all had a beautiful weekend. 🙂

With the New Year already off to a busy start, I am trying to be more prepared when it comes to meals. Sundays are all about planning and prepping, freeing up extra time during the week.

Tonight’s dish was all about combining simple ingredients that are robust in flavour. At first glance, it looks like it probably takes a lot more time than it does. I promise you, that if you are prepared and know the recipe ahead of time, it is smooth sailing!

I don’t cook with parsnips often but am trying to incorporate them more to keep things interesting. This juicy nutty root veg is rich in healthy properties. From phyto-nutrients, vitamins, minerals and fibre. Plus it’s low in calories, fat, sodium and naturally cholesterol-free. Not to mention, super versatile when it comes to consumption!

Need more convincing? Check out these percent daily values:

Parsnip Nutritional Information

Now on to the deliciousness of tonight’s dish. This Parsnip noodle recipe comes from one of my favourite places to be Inspiralized – the definitive resource for cooking with a spiralizer. A few minutes exploring around Ali’s site and you’ll instantly be inspired by her wonderful and beautiful creations. This spiralized parsnips with roasted butternut squash and kale had me dancing in my kitchen with excitement, I was so inspired to give it a try.Parsnip Noodles with Roasted Butternut Squash & Kale

Easy to make, this recipe is really 3 simple components + a couple dashes here and there. Basically you just have to roast the squash, spiralize and cook the parsnips and wilt down the kale. Pretty basic steps. From here all you have to do is dress it up! (more details below on that). 🙂

Parsnip Noodles with Roasted Butternut Squash & Kale (yields two servings)

  •  1 cup cubed butternut squash
  • 1 tablespoon + 2 teaspoons of extra virgin olive oil, divided
  • himalyan sea salt and cracked black pepper, to taste
  • ½ teaspoon paprika
  • 4 parsnips, peeled and spiralized
  • 2 cups chopped kale (curly or laminate)
  • 2 garlic cloves, minced
  • crumbled feta to top (optional)
  • red pepper flakes, to topIngredient List
  1. Preheat the oven to 400 degrees. In bowl, toss butternut squash with 2 teaspoons of olive oil and season with salt, pepper and paprika. Toss to combine and once oven is preheated, lay squash on baking sheet and roast for 30-35 minutes or until tender.
  2. Ten minutes before the squash is done, place a large skillet over medium-high heat and add in the rest of the olive oil. Add in the parsnip noodles and let cook for 5-7 minutes or until cooked through. Transfer the parsnip noodles to a plate.
  3. In same skillet, add in the garlic, sauté for a 2 minutes and add in kale. Let cook until wilted, about 5 minutes and then add in the parsnip noodles and toss.
  4. Divide onto two plates and top with butternut squash, feta (optional) and the red pepper flakes.

Dive in! xx


Banana Bread Granola

I am basically obsessed with the My New Roots: Inspired Plant Based Recipes for Every Season cookbook. Sarah Britton is a true original when it comes to edible inspirations, with an insight on Holistic Nutrition that is thought-provoking and enlightening. This book isn’t just about the pretty pictures (although they are definitely mouth-watering to look at). Sarah breaks out her recipes by season and by dish category – which I absolutely love! Although I am totally guilty of jumping all over, since I want to try them all!

This weekend I tried out her Chunky Banana Bread Granola and I can’t believe I hadn’t thought to add in banana’s to my granola sooner – what a game changer for my granola making days. For one that loves banana bread but looks for a healthier alternative with added nutrients – this is it!

Using banana’s as part of your binding agent will change up any of your go-to granola recipes. Sarah’s recipe is spot on and needs no modification, unless you want to add a few alternate ingredients or use what you have on hand. Just don’t skip out on the Banana – this is the absolute key! My personal recommendation for add-in’s are chia seeds, raw pumpkin seeds, crushed raw almonds or chocolate chips for a treat! What would you add? Check out this amazing breakfast dish-

Banana Bread Granola (yields 9 cups)

  • 3-4 very ripe bananas
  • 1/2 cup pure maple syrup
  • 3 cups rolled oats (gluten-free)
  • 1 cup  buckwheat groats
  • 1 1/2 cups unsweetened large coconut flakes
  • 1/2 cup raw sunflower seeds
  • 2 teaspoons ground cinnamon
  • 1/2 teaspoon fine sea salt
  • 1 cup whole raw walnuts, roughly chopped
  1. Preheat the oven to 350°F. Line 1 or 2 baking sheets with parchment paper.
  2. Melt the coconut oil in a small saucepan over medium-low heat. Pour the melted oil into a food processor or blender, add the bananas and maple syrup, and blend until smooth.
  3. In a large bowl, combine the remaining ingredients – rolled oats, buckwheat groats, coconut flakes, sunflower seeds, walnuts, cinnamon, salt, etc.
  4. Pour the maple syrup mixture over the dry mixture and gently toss to coat.
  5. Divide the mixture between the 2 baking sheets and press it firmly with the back of a spatula to ensure that the mixture is compact and even. Bake the granola for 20 minutes, until it’s beginning to brown.
  6. Remove the baking sheet from the oven and use a spatula to flip the granola over in large sections. Return it to the oven and flip it every 5-8 minutes, making smaller chunks each time, until golden, 15 to 25 minutes more. The granola should be dry and crisp.
  7. Set the granola aside at room temperature to cool. Do not stir the granola until it is completely cool so it will set into chunks.
  8. Store in an airtight container at room temperature for up to 1 month – if it lasts that long!! 🙂

Banana Bread Granola

Go BANANAS! xx