vegan

Lentil Nanaimo Bars

It took me a long time to master the word Nanaimo. It was always Nanaimano up until my first visit to Nanaimo, BC in 1995. It is still a running joke in the family. I grew up loving the sweet, creamy dessert of Nanaimo Bars, whether it was the original, mint, or peanut butter variation, I loved them all.

In time, I grew out of this favoritism and started to try out more interesting desserts. However, when I came across this recipe the nostalgic craving set in.

I would like you all to please note, this recipe is not necessarily going to replace the original ultra sugary, buttery classic Nanaimo bar, but the variation in taste + added nutritional value will make this switch much more favourable.

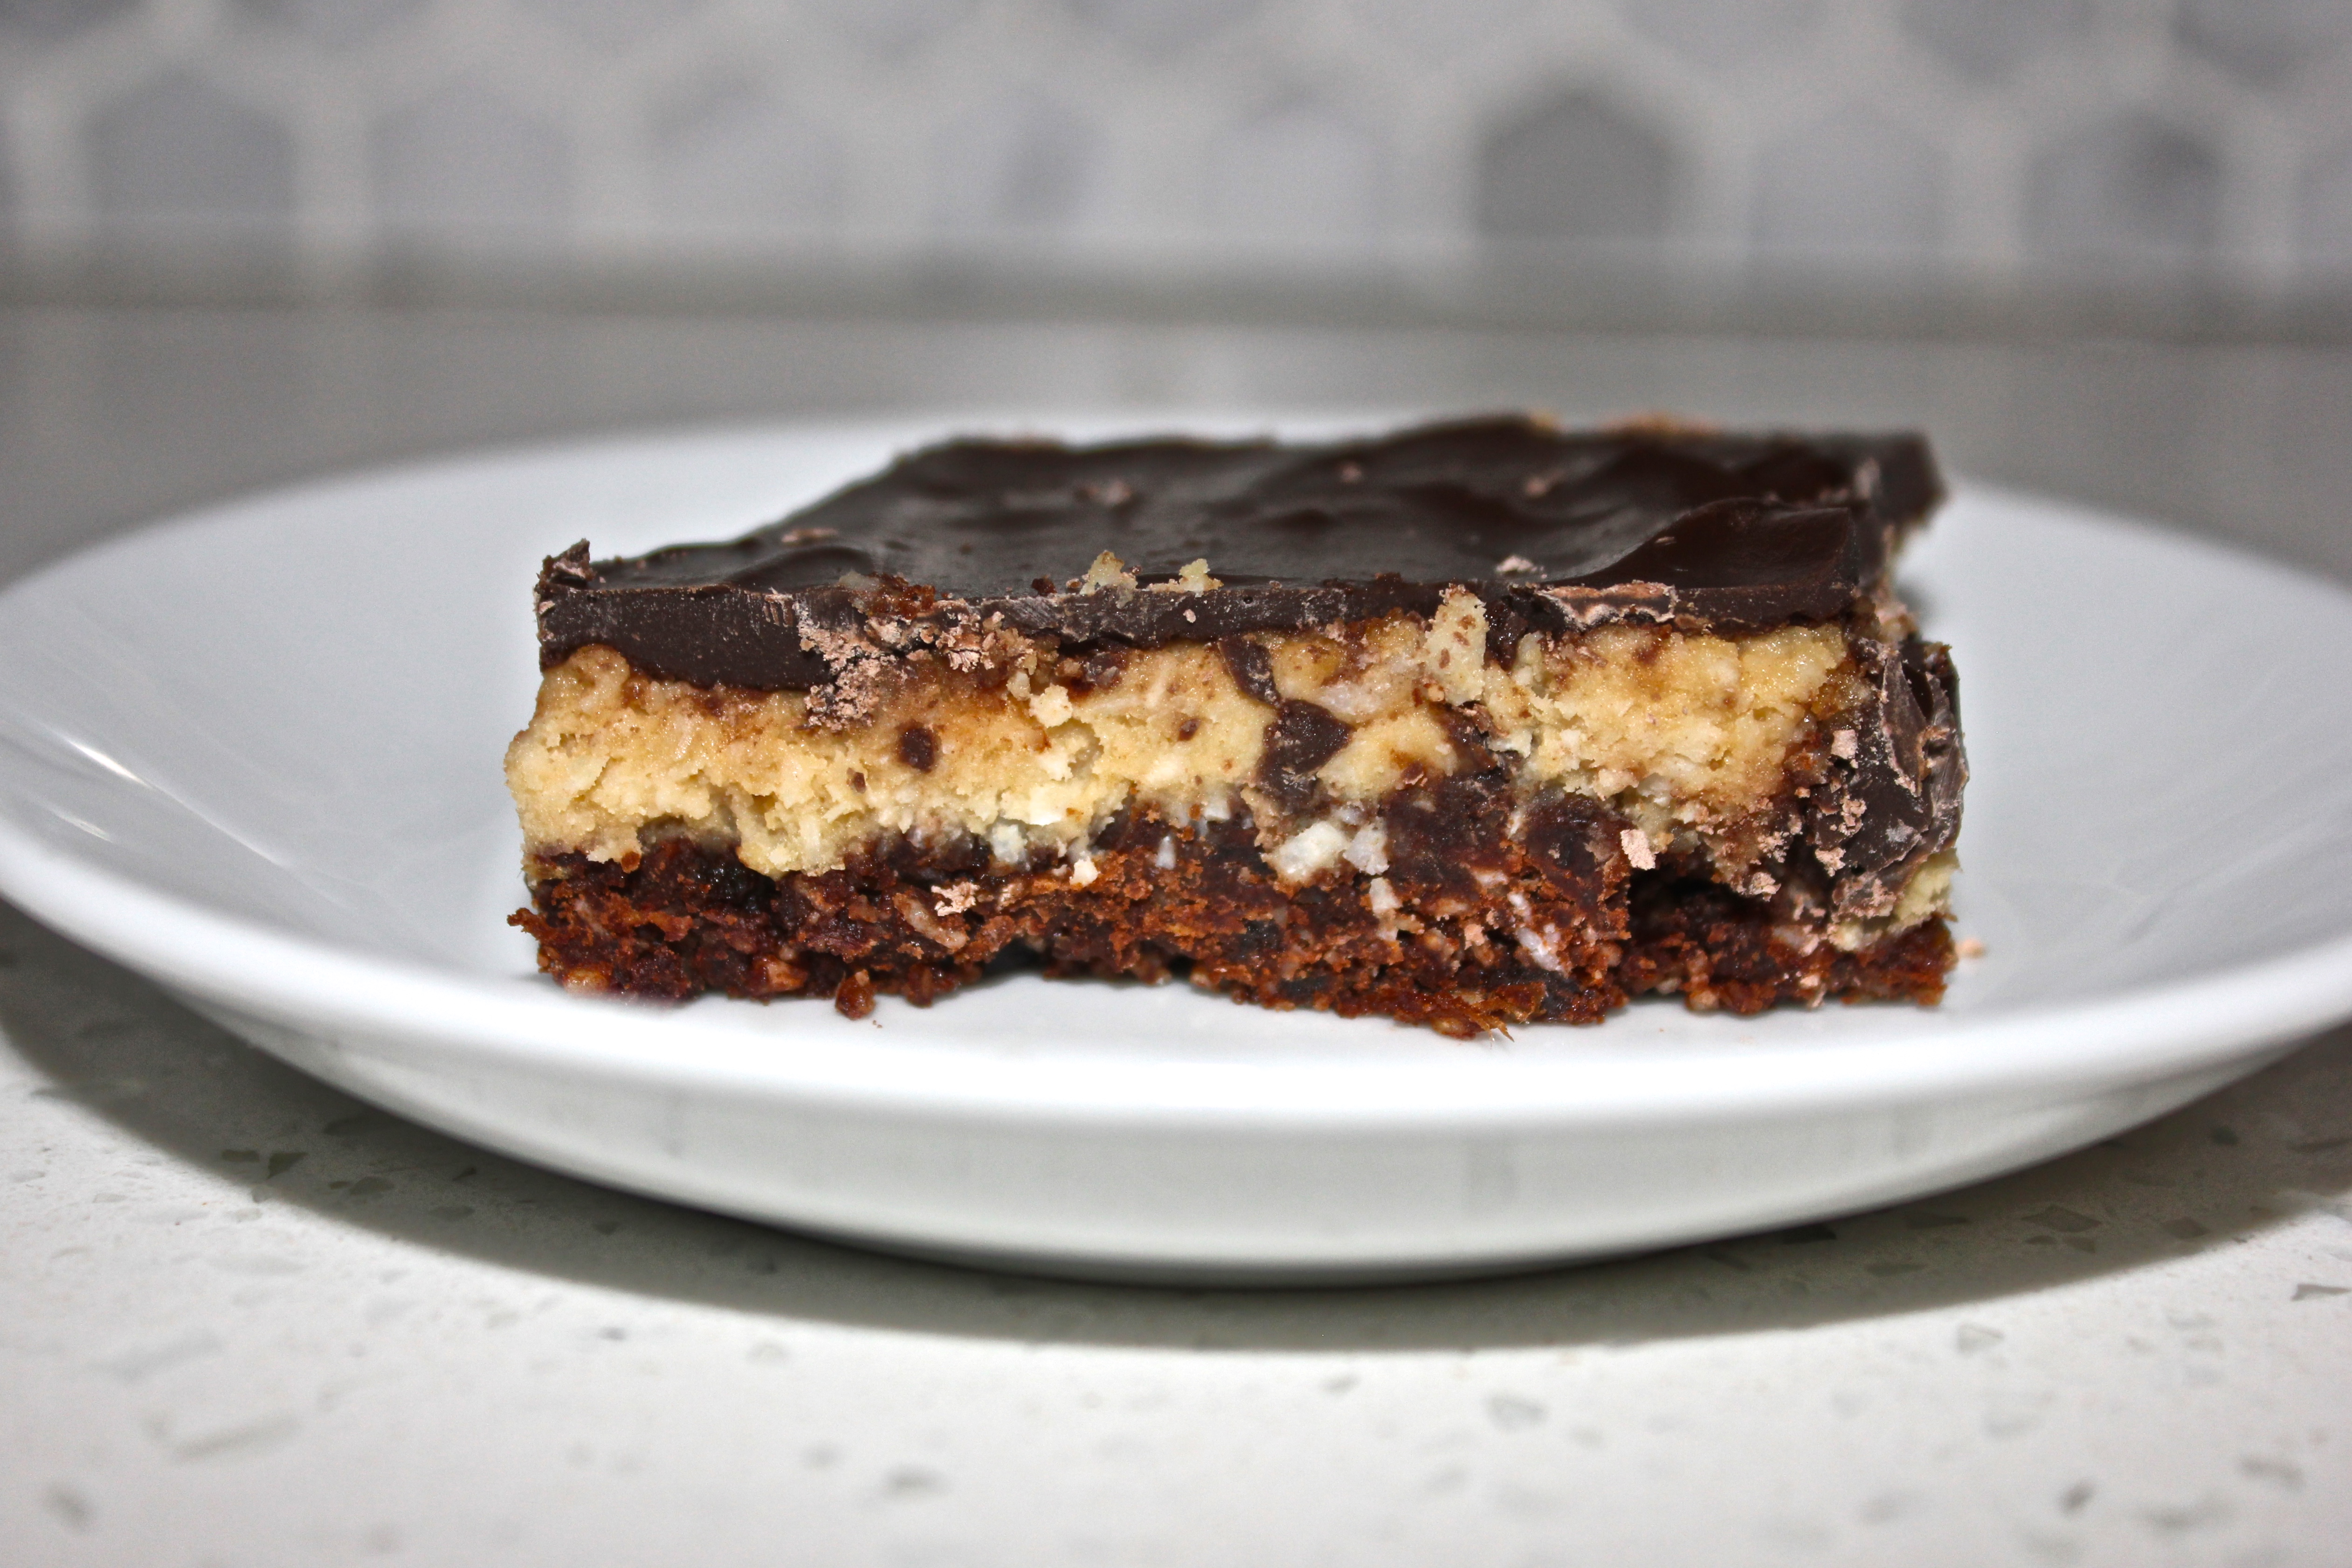
I was pleasantly surprised with this alternative. I dig that this recipe is not as sweet as the original Nanaimo bar, yet it fills all my top requirements in a dessert. Coconut, Nuts, Chocolate. The addition of lentils packs this dessert with protein, iron, zinc and copper. I am telling you it is well worth the try!

The original recipe is found here (this site has some great recipes). I did make a few slight variations which are added in below.

Lentil Nanaimo Bars

For the base:

  • 8 pitted Medjool dates
  • ¾ cups walnut pieces
  • ½ cup unsweetened shredded coconut
  • ¼ cup raw cacao powder or carob powder
  • 2 tbsp melted coconut oil

For the filling:

  • 1 cup unsweetened shredded coconut
  • ½ cup dry red lentils
  • ⅓ cup maple syrup
  • 2 heaping tbsp to ¼ cup melted coconut oil
  • 1 tbsp pure vanilla extract

For the topping:

  • 1 cup of dark chocolate

Instructions

  1. Place your lentils and one cup of water into a small pot. Bring to a boil, then simmer. Stir occasionally for about 12 minutes, until the lentils have broken down and the water is almost completely absorbed.
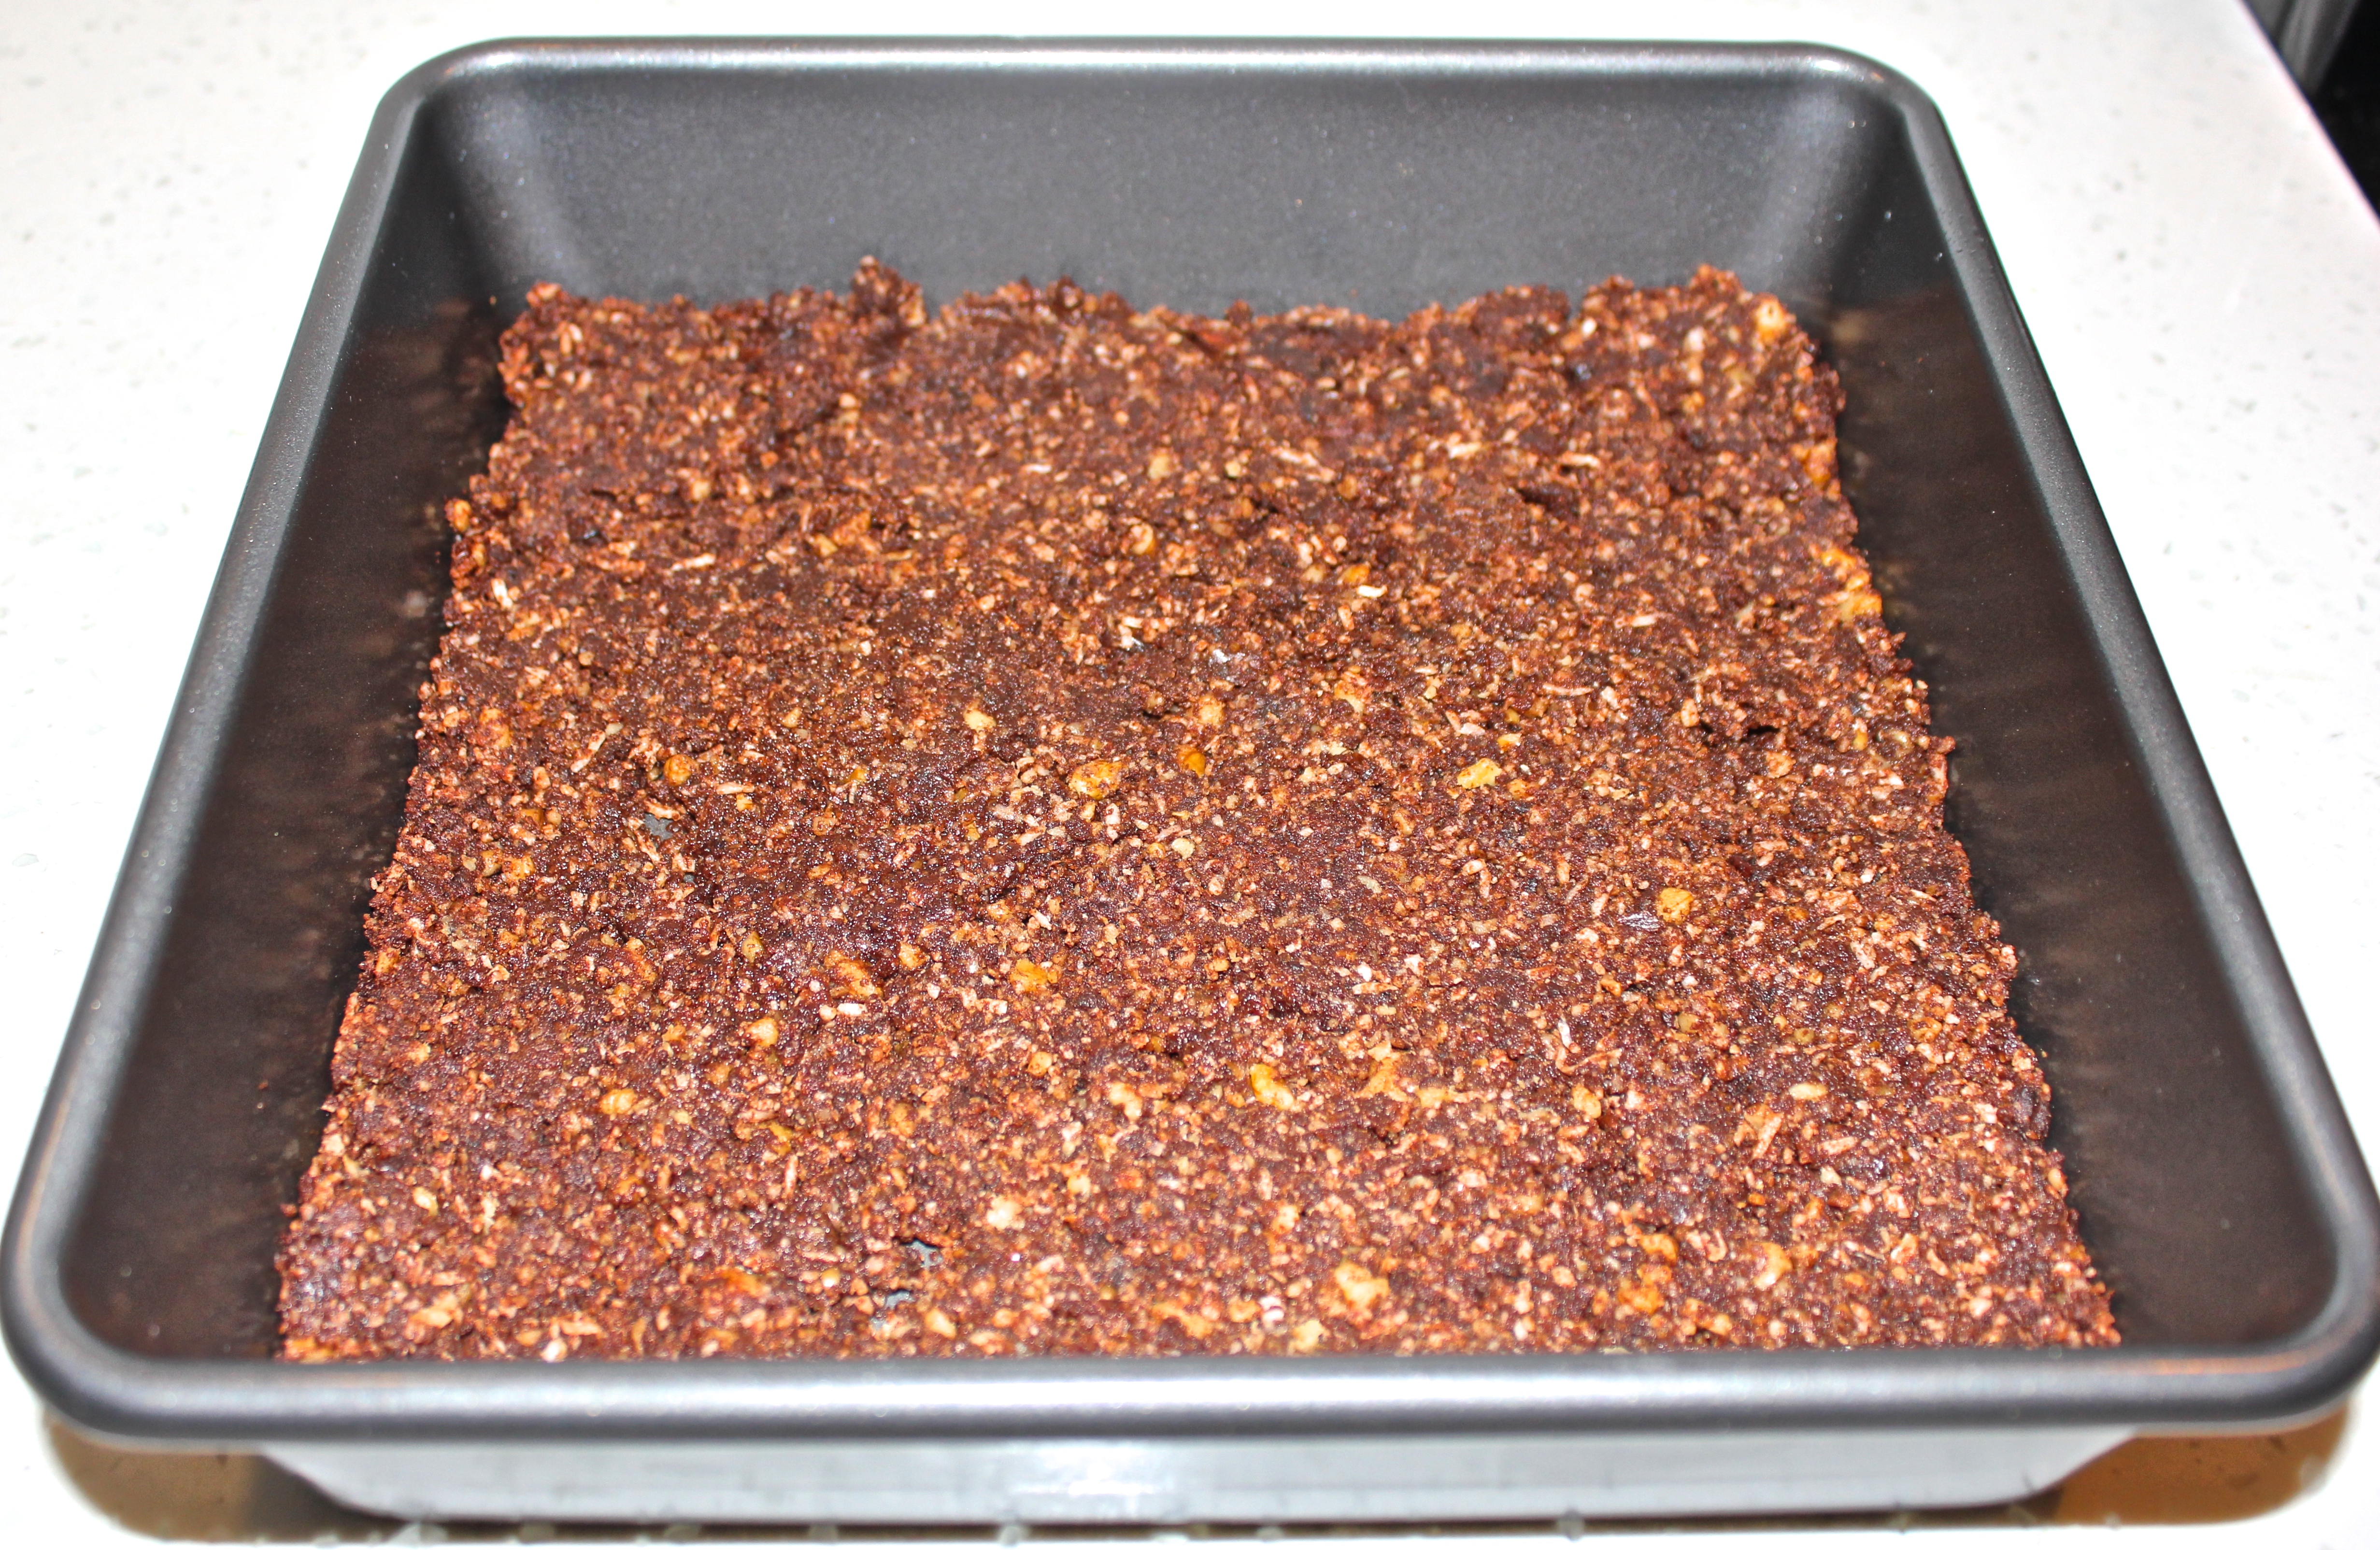
  2. While the lentils are cooking, prepare your base. Add the walnut pieces to a food processor and pulse 6-7 times until they are broken down to a rough meal. Add the dates, coconut, raw cacao/carob and coconut oil. Process until the mixture comes together, about one minute. You’ll be able to pinch the dough with your fingers and have it stay together.
  3. Line a 6 x 6-inch square pan with parchment paper (I used a 9×9 which worked just as well). Dump the base into the pan and press it down as evenly as you can.base
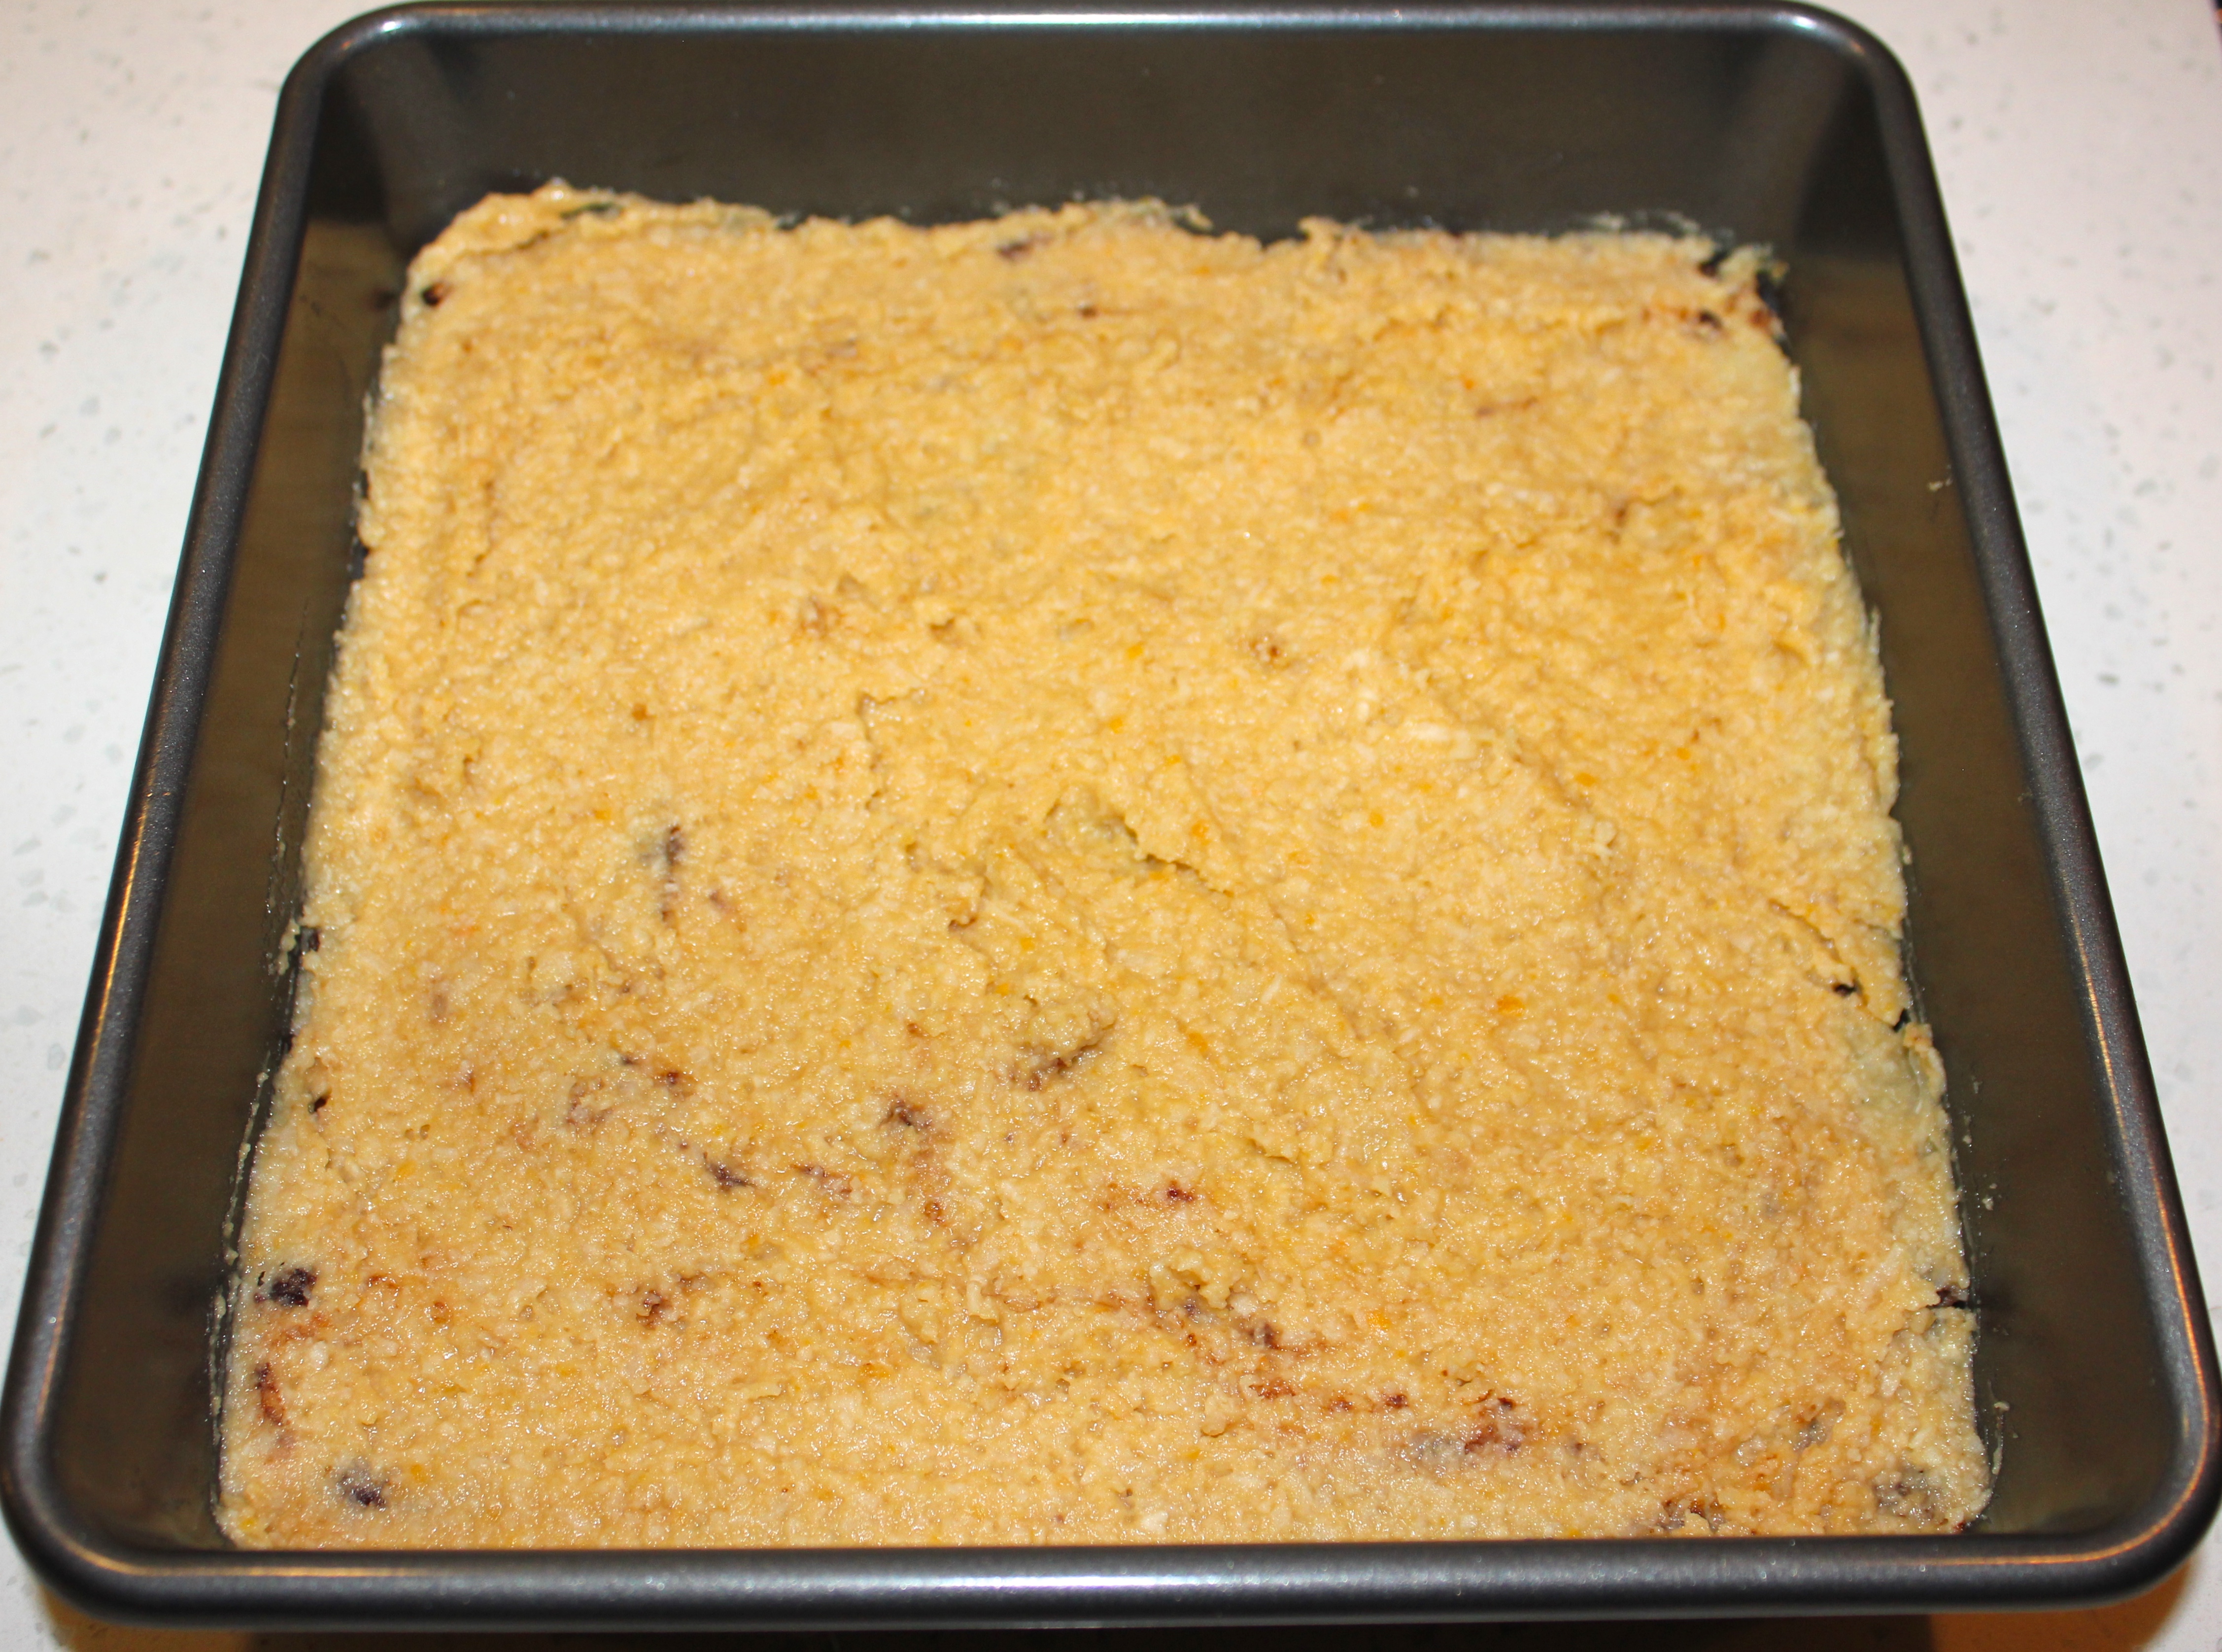
  4. Wipe out the bowl of your food processor with a kitchen towel or paper towel (it shouldn’t be too dirty). Add your one cup of shredded coconut to the bowl and blend for a minute or two, until it breaks down even more finely. Pour your cooked lentils, maple syrup, vanilla, and coconut oil into the processor and blend for 2-3 minutes, until the filling is smooth and creamy. Taste and adjust for sweetness if necessary.
  5. Pour the filling over the base and spread evenly. Pop the pan into the fridge to harden.filling
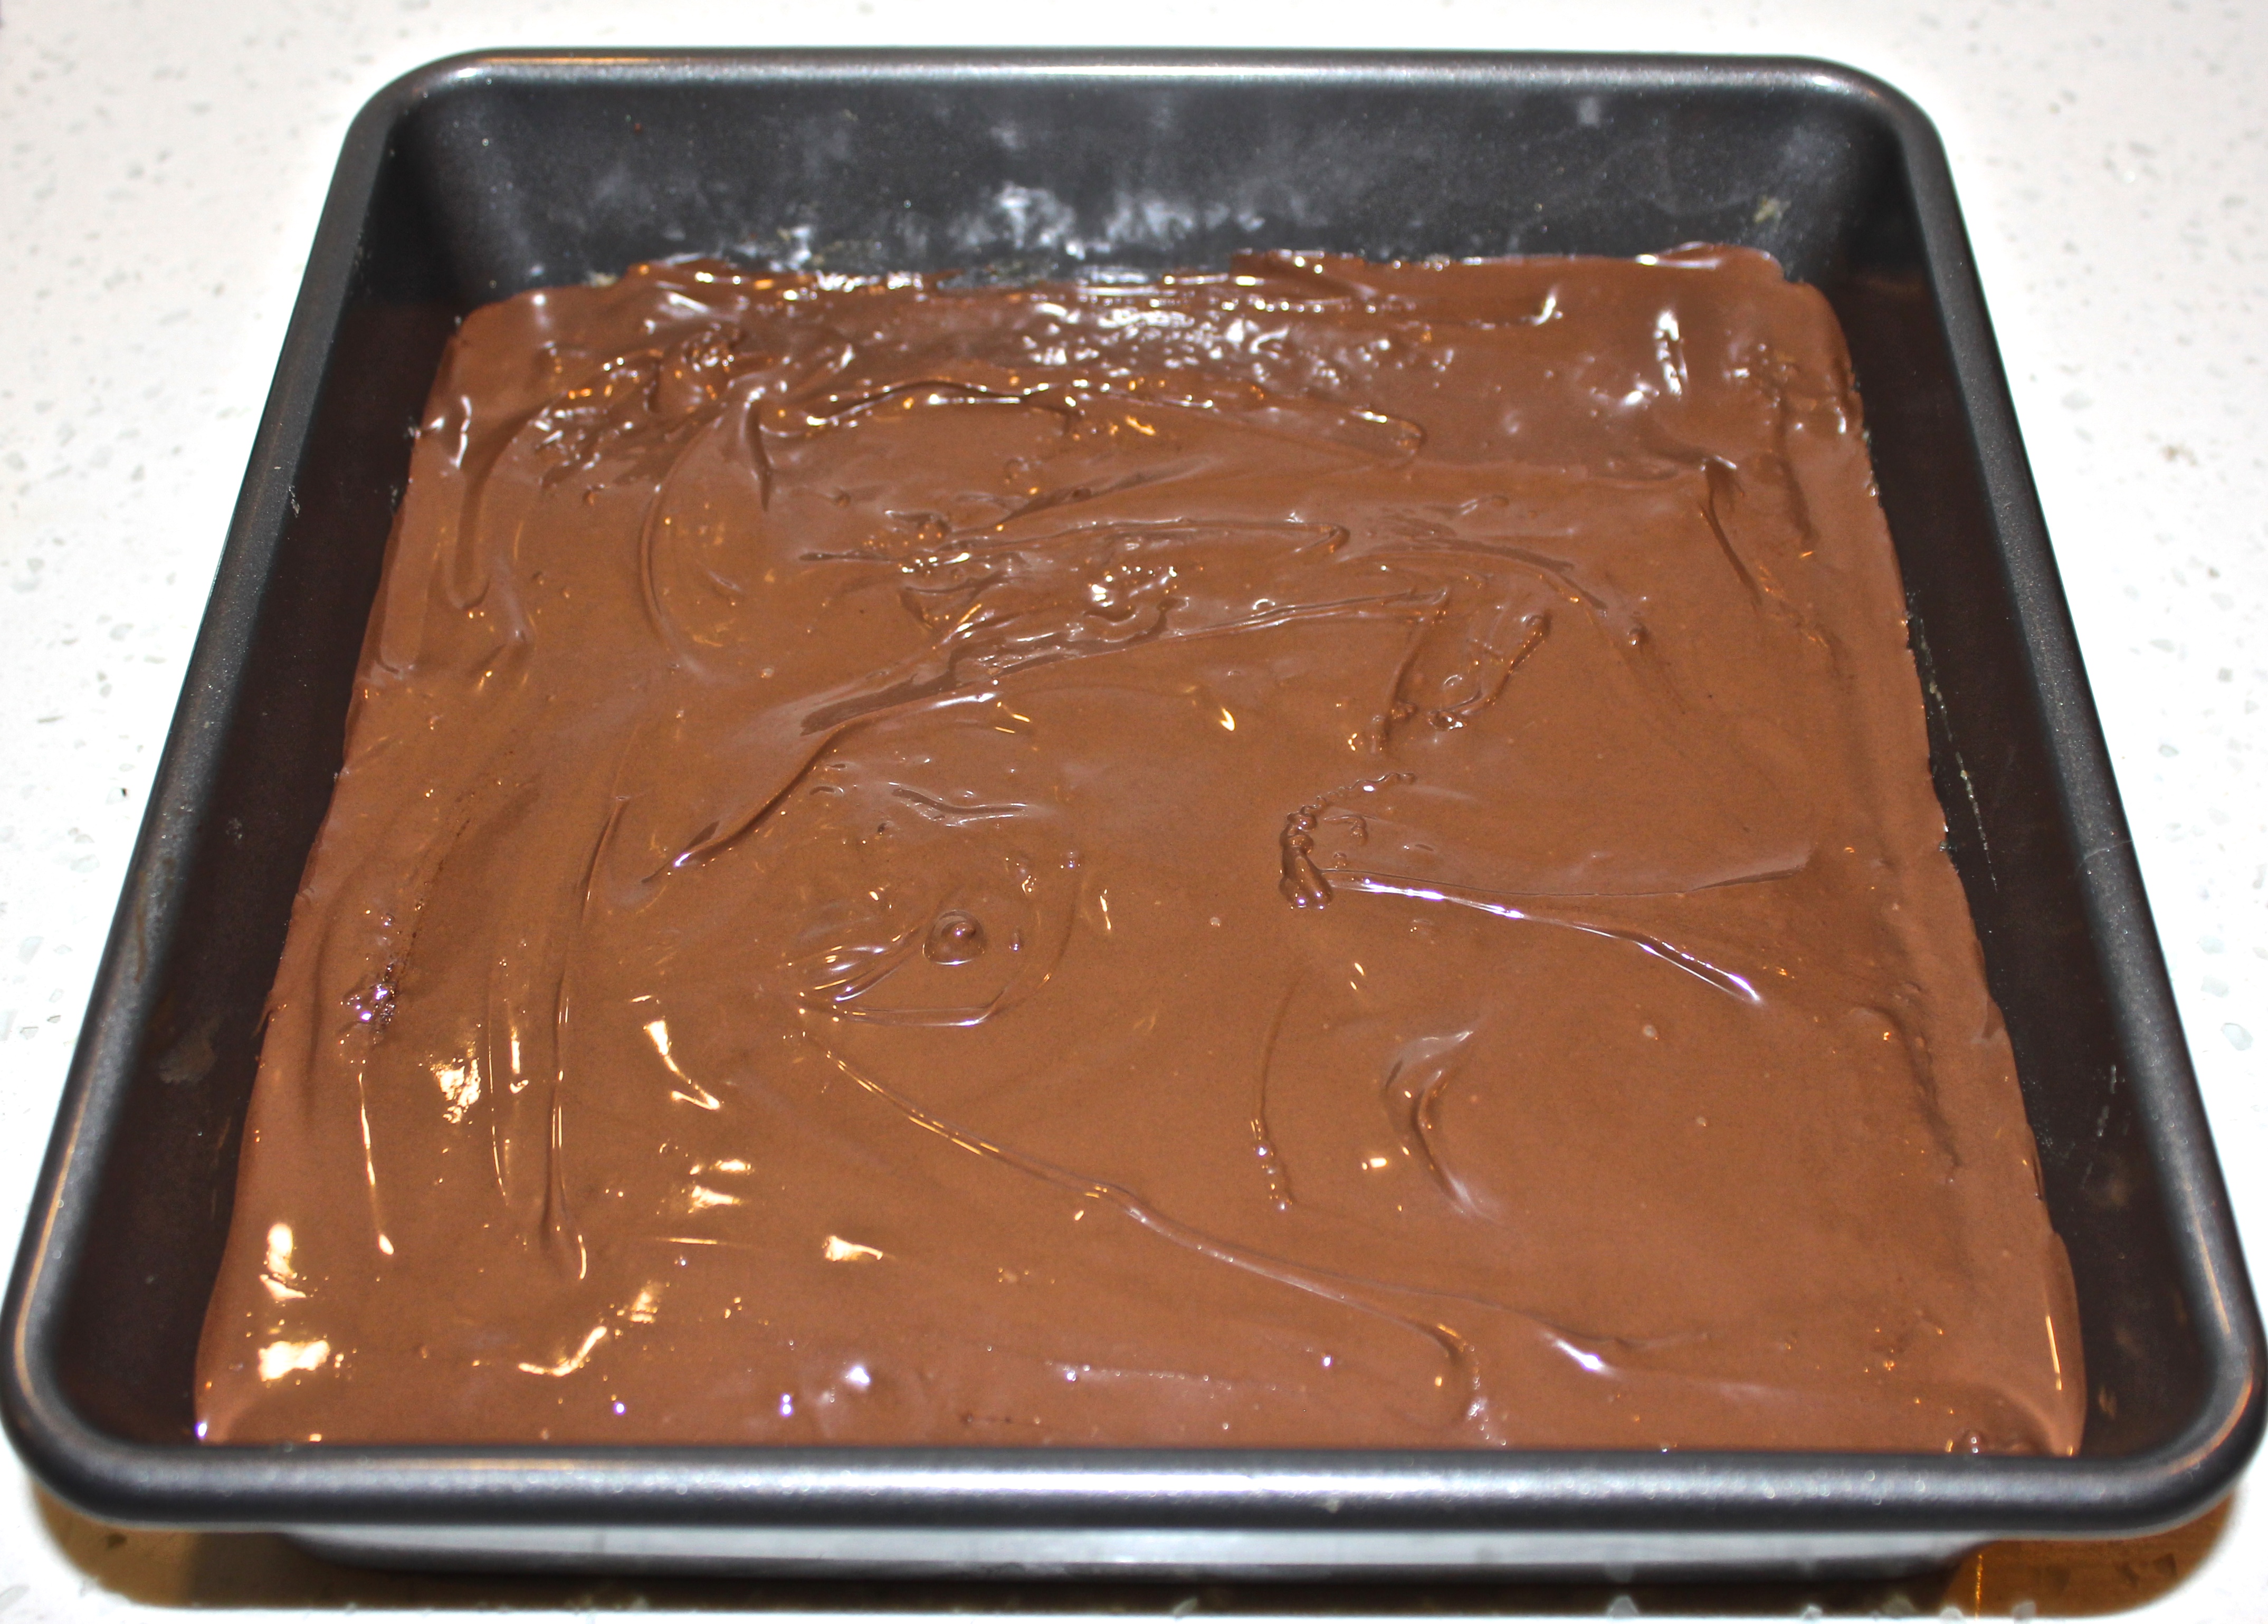
  6. Gently melt the dark chocolate bar and pour over the base. Chill in the fridge until set.topping

Keep an open mind with these, if it’s been years since you have had the original Nanaimo, it’ll be hard for you to taste the difference. Hope you enjoy!

Lentil Nanaimo BarTreat Yourself. xx


Vegan Lasagna with Basil Cashew Cheese

Okay, my first thought was, “Really what could possibly compare to a traditional lasagna?” While I am definitely on Team Veg, I knew it would be hard to please the man of the house with a vegan friendly option, as well as satisfy his Italian taste buds.  I mean I do love the traditional meat lasagna with all the gooey cheese, but I often find myself resisting temptation to indulge due to the “not so hot” feeling afterwards; not to mention the perception lasagna has for being such a task to make. I had the craving for that warm comforting meal, without the comforting calories. Luckily, I had this recipe sent my way from a friend with the affirmation that her husband loved it too, more than regular lasagna! Done and done, this was now Sunday night’s dinner.

IMG_4340

Well, I definitely have proven myself wrong with this recipe, taken from Oh She Glows, this vegan lasagna far surpassed my expectations (as well as his!) and would fool any lasagna lover otherwise. I mean it’s evident that there is no meat sauce, but the flavour combination from the sautéed veg, sugo, and the basil cashew cheese, one would never question the difference.

Hope you enjoy today’s dish.

Lemon Basil Cashew Cheese (Yield ~2 cup)

  • 1.5 cup raw cashews, soaked in water for 30 mins or overnight
  • 2 garlic cloves, peeled
  • 1/4 cup fresh lemon juice
  • 1 tbsp dijon mustard
  • 1/4 cup vegetable broth or water (or more as needed)
  • 1.5 cups fresh basil leaves (lightly packed)
  • 1/2 cup parsley
  • 1/2 cup nutritional yeast (gives the cheese flavour)
  • 3/4-1 tsp kosher salt (or to taste) + freshly ground black pepper
  • 1/2 tsp onion powder (optional)
  1. Drain and rinse soaked cashews
  2. Add ingredients in order listed and process until smooth

Vegan Lasagna (Yield ~12 servings)

  • box of oven ready lasagna noodles
  • 1.5 bottles of pasta sauce
  • 3 garlic cloves, minced
  • 1 sweet onion, chopped
  • 2-3 small zucchini, chopped
  • 2 cups assorted mushrooms, sliced
  • 1-2 red pepper, chopped
  • 2 cups spinach
  • Lemon Basil Cheese Sauce (from above)
  • Daiya mozzarella cheese or vegan feta (as much as desired)
  1. Preheat oven to 400F. In a large skillet, sauté onion and garlic over low-medium heat for 5-10 minutes. Now add in the rest of the veggies and sauté for another 10-15 minutes. Season well with salt and pepperIMG_4362
  2. Add 1 cup of pasta sauce on the bottom of your casserole dish. Add a layer of noodles, half the basil cheese sauce, half the vegetables, more pasta sauce, another layer of noodles, the rest of the cheese sauce, the rest of the vegetables, more pasta sauce, and finally a sprinkle of cheeseIMG_4371
  3. Cover with tinfoil and prick with fork a few times. Bake at 400F for 40-45 minutes and then remove tinfoil and broil for 5 minutes on medium. Watch closely so you don’t burn the edges. Remove and serve. Will keep in the fridge for at least 3-4 daysIMG_4377IMG_4393

Eat Hearty! xx


Chia Pudding

The tiny chia seed is a powerhouse of nutrients. It’s loaded with fiber, calcium, maganese, omega 3 fatty acids, protein, and various antioxidants. All of which offer benefits to our heart, brain, digestive, bone and oral health. No wonder it’s a superfood!

You can easily add the chia seed into your daily diet due to its tasteless nature.  I find it easiest to sprinkle on salads, add it to smoothies, or most favourably- chia pudding!

This recipe comes together easily and you can top it however you like.  Interchangeably chia pudding makes a great breakfast or dessert. And an added bonus, this recipe is vegan, raw, and gluten-free.

Chia Pudding (2 servings)

  • 1 cup unsweetened vanilla almond milk
  • 4 tbsp chia seeds
  • 1/2 tbsp pure vanilla extract or maple syrup
  • 1-2 tbsp of unsweetened coconut
  • any toppings of your choice – fresh fruit, raw nuts, coconut are my go-to
  1. Combine almond milk, vanilla extract, chia seeds in a jar and shake until combined
  2. Chill in refrigerator for 4 hours or leave overnight
  3. Remove from fridge, stir in coconut and mix until smooth
  4. Serve with your favourite toppings

Chia Pudding

 Enjoy. xx